Category: Articles

  • OCAD Industrial Design Portfolio: From Sketchbook to Submission

    OCAD Industrial Design Portfolio: From Sketchbook to Submission

    OCAD Industrial Design Portfolio: From Sketchbook to Submission

    Students applying to industrial design routinely submit a portfolio built for a fine art program — beautifully rendered drawings, strong observational work, and almost no evidence that they have ever thought about how a physical object gets made or held. Industrial design reviewers are assessing something different: whether an applicant can look at an ordinary object, understand why it was built that way, and propose something better with reasons attached. Here’s what belongs in the submission, why the sketchbook carries more weight here than in almost any other program, and a build order that gets a student from blank pages to a finished portfolio.

    The Discipline Is About Objects and the People Using Them

    Industrial design sits closer to engineering than most applicants realise, and much closer to it than concept art or illustration does. The subject is manufactured objects — tools, furniture, appliances, medical devices, packaging, transport — and the constraints are real: materials behave in specific ways, manufacturing processes have limits, costs matter, and a person has to actually hold the thing.

    That changes what a portfolio needs to prove. A rendering of a striking-looking chair demonstrates drawing ability. A sequence showing the chair’s problem, four structural approaches, a materials decision, a sketch model in cardboard, and a resolved design with dimensions demonstrates design ability. The second one is what an industrial design reviewer is looking for, and it is dramatically rarer in applicant portfolios.

    The practical implication for a high school student: at least half the portfolio should show process, not just outcomes. Reviewers want to see how a student arrived somewhere, because arriving somewhere interesting is the transferable skill.

    What Belongs in the Pieces

    OCAD University sets a common portfolio expectation across its programs — a relatively small number of finished works, in the range of roughly eight to ten, submitted alongside a sketchbook and a written statement of intent. Requirements are reviewed annually and can vary by program stream, so confirm the current specifications on OCAD’s admissions pages before finalising anything.

    Because the piece count is small, each inclusion has to earn its place. For an industrial design applicant, a defensible spread looks something like this:

    Observational drawing from life (two to three pieces). Objects, hands, mechanical parts, drapery, architectural detail. This remains the foundation, and industrial design reviewers care about it specifically because a designer who draws objects accurately has learned to see how objects are constructed.

    A product teardown or analysis (one piece). Take an everyday object — a stapler, a bike brake, a kettle — and document how it works through exploded drawings and annotated sketches. This is one of the strongest single pieces an applicant can submit, and almost nobody does it.

    One or two full design sequences. A stated problem, exploratory sketches, several distinct approaches, a chosen direction, and a resolved proposal. Presented so the sequence reads clearly on the page.

    Orthographic and technical drawing (one piece). Front, side, top, with dimensions. Hand-drafted is entirely acceptable and often more persuasive than CAD at this stage.

    Physical model documentation (one to two pieces). Photographs of models made in cardboard, foam, clay, or wood, ideally showing more than one iteration.

    One personal piece. Something outside the design brief — a painting, a sculpture, a photograph series. This is frequently what makes an applicant memorable rather than competent.

    Students who compare this with what’s expected in entertainment-facing design fields will notice the difference immediately: where a concept art portfolio is built around invented worlds and character silhouettes, an industrial design portfolio is built around real objects, real hands, and real manufacturing constraints. Applicants weighing both directions should pick one to lead with rather than splitting the portfolio between them.

    The Sketchbook Carries More Weight Here Than Anywhere Else

    For most programs, the sketchbook is supporting evidence. For industrial design, it is often the most informative item in the entire submission.

    A designer’s sketchbook shows quantity of thinking. It should be dense with quick object studies, mechanisms, hinges, handles, measured notes, dimensions scribbled in the margin, and dozens of variations on the same idea. Reviewers are reading for volume and habit — whether this is a person who notices objects constantly, or a person who produced a sketchbook because the application required one.

    The most common failure is the curated sketchbook: clean, sparse, one nice drawing per spread, made in a few weeks. It reads as a portfolio piece rather than a working document, and it undermines the credibility of the process work sitting next to it.

    What a strong industrial design sketchbook contains:

    • Fast perspective sketches of objects seen during the day, drawn in minutes rather than hours
    • Mechanisms taken apart on the page — how a clip works, how a lid seals
    • Ergonomic notes: where a hand goes, why a grip is uncomfortable
    • Repeated variations on one form, ten or fifteen at a time
    • Failed ideas left in, not torn out

    Filling one properly takes months, which is why it belongs at the very start of the process rather than the end.

    Model-Making Is the Underused Advantage

    Very few high school applicants submit physical models, and it is one of the easiest ways to stand out for an industrial design application specifically.

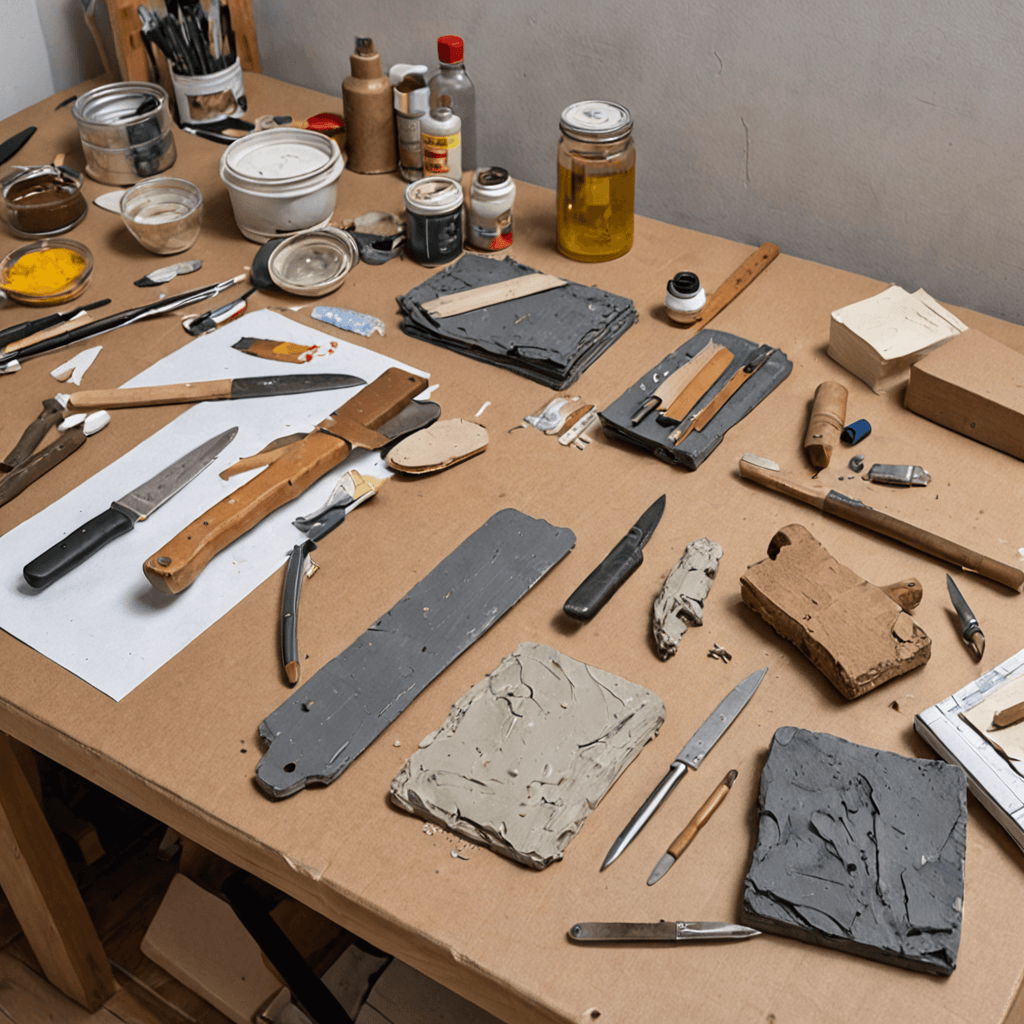
    Models don’t need to be sophisticated. Cardboard, foam core, hot glue, and a craft knife are enough to demonstrate three-dimensional thinking, and reviewers explicitly value evidence that a student can move from a drawing into a physical object. What matters is that the models show iteration: three rough versions of a handle, photographed together, communicates far more than one tidy finished model.

    Photograph them properly — plain background, even light, several angles, and a scale reference such as a hand or a common object in frame. Bad documentation is the most common reason good models fail to help an application.

    The Statement of Intent

    For design applicants, the statement is doing real assessment work, not administrative work. Reviewers use it to understand how a student thinks about the discipline.

    The versions that land tend to be specific and slightly unglamorous — a paragraph about an object the student found badly designed and what they would change about it, rather than a general declaration about a lifelong love of creating. Concrete curiosity about ordinary things is exactly the disposition industrial design programs are selecting for.

    Write it after the portfolio is assembled, not before. The pieces will tell the student what their actual interests are, and the statement is stronger when it describes work that exists.

    A Build Order From Sketchbook to Submission

    Months 1–3 — sketchbook and observation. Daily object sketching. Weekly life drawing. No finished pieces at all. Begin the product teardown as a slow background project.

    Months 4–6 — design under constraint. Two written briefs, each addressing a real problem the student has personally encountered. Exploratory sketching in volume. First cardboard models, deliberately rough.

    Months 7–9 — resolution and technical work. Develop the strongest direction. Orthographic drawings with dimensions. Refined models, photographed as they’re built rather than only at the end.

    Months 10–11 — selection, documentation, statement. Cut to the required count. Photograph and scan everything at high quality. Sequence the submission so a process piece appears early — it sets the frame for everything after it. Draft the statement of intent.

    Month 12 — buffer and review. Get outside eyes on it. Deadlines and submission specifications come from the university and change; verify them directly rather than trusting a checklist from a previous year.

    Students building toward design programs generally benefit from working with an instructor through the middle stretch, when the temptation to abandon process work for finished renderings is strongest. Our portfolio preparation program runs on one-hour private sessions built around the individual student’s gaps, and local families can see the same program detailed for portfolio preparation in Etobicoke. Sessions run $310 monthly with all materials included, and a $70 trial includes a frank assessment of where the current work sits.

    FAQ

    Does an industrial design applicant need CAD or 3D software skills?

    Not for admission. Programs teach the software, and hand drawing plus physical models communicate design thinking more clearly at the application stage. CAD work included in a portfolio should sit alongside hand work rather than replacing it.

    Can a student apply to industrial design without any product design experience?

    Yes, and most applicants have none. What’s needed is evidence of the underlying disposition — observational skill, curiosity about how objects work, and the ability to generate multiple solutions to a problem. All three can be built in a year of deliberate work.

    How different is an industrial design portfolio from an illustration or drawing portfolio?

    Substantially. The observational foundation overlaps, but industrial design portfolios are weighted toward process, three-dimensional thinking, technical drawing, and objects made for use. A portfolio assembled for a drawing program usually needs meaningful reworking before it suits a design stream.

    Should the portfolio include work from high school art class?

    Only if it’s genuinely strong and genuinely the student’s own direction. Class assignments completed to a common brief tend to look like class assignments, and reviewers see hundreds of them. Independent work almost always reads better.

    Does OCAD interview industrial design applicants or review portfolios in person?

    Review formats and any in-person opportunities are set by the university and change from cycle to cycle. Check OCAD’s current admissions information directly, and treat portfolio review events as valuable when they’re offered — feedback before submission is worth more than any amount of guessing.

    How many hours a week does building this portfolio actually take?

    Most students who finish well are putting in somewhere between four and eight hours weekly across the year, with the sketchbook absorbing a large share of it in daily fragments rather than long sessions. Students attempting it in a compressed three-month sprint almost always end up submitting finished renderings with no process behind them.

    Starting the Build

    The applicants who do well in industrial design admissions are rarely the ones with the most polished pictures. They’re the ones who can show a reviewer a page of fifteen handle variations, a cardboard model that didn’t work, and a clear explanation of what they learned from it.

    If your teen is considering a design program and you’d like an assessment of where their current work stands, book a trial session at our Etobicoke studio near Cloverdale Mall. Our breakdown of OCAD portfolio examples from accepted students is a useful companion for seeing how finished submissions come together across programs, and you can always request more information if you’d like to ask questions before booking anything.
  • Drum Practice Pads vs Kits: What Etobicoke Students Buy First

    Drum Practice Pads vs Kits: What Etobicoke Students Buy First

    Drum Practice Pads vs Kits: What Etobicoke Students Buy First

    Nearly every family beginning drum lessons asks the same question in the first week — do we need to buy a kit, or is a practice pad enough to start? The honest answer is that a pad is the correct first purchase for almost every beginner, and that the reasons have far more to do with what develops technique than with saving money or managing noise. Here’s what a pad genuinely trains, what it can’t, and the buying sequence that avoids spending twice.

    The Short Version

    For a student starting drums in their first year: buy a practice pad, a pair of sticks, and a stand. Do not buy a kit yet.

    That recommendation holds for roughly the first three to six months, and it is not a compromise position. It reflects how drumming is actually taught. The first stretch of drum instruction is almost entirely about hand technique — grip, rebound, stroke height, evenness between hands, and the rudiments that everything later is built from. All of that happens on a single surface. A five-piece kit sitting in the basement during that period contributes nothing to it, and frequently contributes something worse: a student who spends practice time playing along to songs instead of building the hands.

    There’s a caveat, and it’s a real one — pads don’t develop limb coordination, and eventually that becomes the bottleneck. The question isn’t whether to buy a kit but when, and the answer is usually “when the teacher says the hands are ready,” not “when the student starts lessons.”

    What a Practice Pad Actually Trains

    More than most parents expect, and more than most students want to believe.

    Stroke mechanics and rebound control. A good gum rubber pad has a rebound response close enough to a snare drum that the motion transfers directly. Students learn to let the stick do the work rather than driving it into the head — the single most important habit in the first year, and the hardest one to fix later.

    Evenness between hands. Almost every beginner has a dominant and a weak hand, and the gap is glaring on a pad because there’s nothing else in the texture to hide it. On a full kit, a weak left hand disappears into the general noise. On a pad, it’s the only thing you can hear, which is exactly why it improves.

    Rudiments. Singles, doubles, paradiddles, flams, and the roll family are the vocabulary of every style a drummer will ever play. They are learned on a flat surface, at slow tempos, with a metronome, and they are the difference between a student who can keep a beat and one who can actually play.

    Timekeeping. Metronome work is more honest on a pad. There’s no cymbal wash to blur a slightly early note.

    Reading. Notation study happens on a pad long before it happens on a kit.

    A student who spends four months doing this properly will sit down at a kit and progress remarkably quickly. A student who skipped it will spend a year playing beats with uneven hands and then need to go back and do it anyway.

    What a Pad Can’t Do

    Being straight about the limits matters, because a pad kept too long produces its own problem.

    A pad trains two limbs. Drumming requires four, moving independently, and that coordination is a genuinely separate skill that cannot be developed on a flat surface. Foot technique — heel-up and heel-down, bass drum control, hi-hat pedal work — needs actual pedals. Moving around the kit requires distance, arm travel, and the spatial memory of where the toms are without looking. Dynamics across different surfaces, cymbal control, and the physical stamina of playing a full kit are all kit-only skills.

    There’s also a motivational dimension worth naming. A pad is not fun for very long. For most students aged eight to twelve, somewhere around month four the pad stops feeling like drumming, and that’s usually the right moment to introduce the kit — not because the technique is finished, but because the technique now has somewhere to go.

    The Housing Question

    This is the part specific to a lot of Etobicoke families, and it deserves a practical answer rather than an optimistic one.

    Condos and apartments. An acoustic kit is not realistic. Even with mesh heads and low-volume cymbals, the bass drum pedal transmits impact through the floor structure, and that is the complaint that arrives regardless of how quiet the drum sounds in the room. Families in buildings should plan on a pad plus an electronic kit on a riser, with headphones — and even then, a rubber isolation platform under the kick is worth the cost.

    Semi-detached and townhouses. An acoustic kit is possible with genuine preparation: mesh or low-volume heads, low-volume cymbals, a rug, and an agreement with neighbours about hours. Many families find an electronic kit simpler.

    Detached homes with a basement. An acoustic kit works, and this is where most students should end up eventually. Basements are usually the right room — concrete absorbs impact and the sound travels less through the house.

    Worth noting for families weighing instruments across siblings: households that already accommodate piano lessons in Etobicoke sometimes assume drums will be comparable. They aren’t. A piano at conversational volume is a different category of neighbour consideration than a kick drum, and it’s better to plan for that at the start than to discover it in month five.

    A Buying Sequence That Avoids Spending Twice

    Stage one — the first lesson. A practice pad, roughly eight to twelve inches, with a gum rubber playing surface rather than the hard plastic type. A stand so it sits at the correct height, because a pad on a table teaches poor posture. One pair of 5A wood-tip sticks. A metronome, or a free metronome app.

    Total outlay here is modest — comfortably the smallest instrument investment of any of the instruments we teach.

    Stage two — around months three to six. A snare drum on a stand, plus a hi-hat and pedal. This is the underrated step most families skip. It introduces the foot, the hi-hat, and the coordination between them, at a fraction of the cost and space of a kit, and it covers an enormous amount of foundational groove work.

    Stage three — once coordination is established. A full kit, acoustic or electronic depending on housing. Buy used for a first acoustic kit; beginner drum kits hold up well and depreciate sharply, so the second-hand market is genuinely good value. For electronic, mesh heads are worth prioritising over the number of pads — rubber-pad electronic kits teach a rebound feel that doesn’t transfer to acoustic drums.

    Stage four — the upgrade that matters most. Cymbals, not drums. Beginner kits almost always ship with poor cymbals, and cymbals are the sound of a kit. When a student is committed, upgrade cymbals before upgrading shells.

    Instruction here doesn’t depend on the student owning a kit — our drum lessons in Etobicoke run on a full kit at the studio, so home equipment only needs to support the practice assignment rather than replicate the lesson. Trial lessons run $35, and ongoing private instruction is $155 monthly with all materials included.

    What Home Practice Should Look Like at Each Stage

    With a pad only, a beginner’s session is short and specific: five minutes of single strokes at a slow tempo, five minutes on the rudiment currently assigned, five minutes of reading. Fifteen minutes, five days a week, beats an hour on Sunday by a considerable margin — the hands develop through repetition spread across days, not through volume in one sitting.

    With a snare and hi-hat, sessions add coordination work: hi-hat on quarters against varied snare patterns, slowly, with a metronome.

    With a full kit, the risk changes. Kit practice tends to become playing along to songs, which is enjoyable and builds very little. The rule that works: pad and rudiment work first, kit second. Most students will do the second regardless; only structure guarantees the first.

    FAQ

    How long should a student stay on a pad before getting a kit?

    Typically three to six months, but the trigger is technical rather than calendar-based. When single and double strokes are even between hands at a moderate tempo and the student can hold a steady pulse against a metronome, the hands are ready for the kit to be useful.

    Are electronic kits acceptable for serious study?

    Yes, with two caveats. Mesh heads rather than rubber pads, because rubber teaches a rebound response that doesn’t transfer to acoustic drums. And the student should have regular access to an acoustic kit — a lesson on one each week is generally enough to keep the feel calibrated.

    Is a cheap practice pad good enough?

    Mostly yes, with one exception: avoid hard plastic surfaces with almost no give. A basic gum rubber pad on a stand does everything a beginner needs, and the expensive pads offer refinements that matter to advanced players rather than to first-year students.

    Can a beginner start drums without buying anything at all?

    For the first few weeks, yes — sticks and a pillow or a phone book will do for the very first exercises, and some students start that way to confirm the interest before spending. It shouldn’t continue much past a month, because a surface with no rebound builds the opposite of the technique being taught.

    What age is right to start drums?

    Most students do well starting around six or seven, provided the equipment fits — a pad and a proper-height stand is genuinely age-neutral, which is another argument for beginning there. Kit ergonomics are the limiting factor for younger children, not the drumming itself.

    Do you teach drums in group classes?

    No — all our music instruction is private, one student to one teacher. For drums in particular that’s the only structure that works, since hand technique needs individual correction from the first lesson onward.

    Getting Started

    The families who spend the least on drums over five years are usually the ones who bought a pad first and let the teacher tell them when the kit was needed. The ones who spend the most are the ones who bought a full kit in week one and replaced it in year two, after the student’s technique had been built around whatever the beginner cymbals happened to sound like.

    If you’re weighing what to buy for a student starting this fall, book a trial lesson at our Etobicoke studio near Cloverdale Mall and we’ll give you a specific recommendation based on the student’s age, housing, and how far along they are. If you’d like to ask about equipment before committing to a lesson, request more information and we’ll answer directly.

  • Concept Art Portfolio for Teens: What Studios Expect to See

    Concept Art Portfolio for Teens: What Studios Expect to See

    Concept Art Portfolio for Teens: What Studios Expect to See

    Teenagers who want to design characters, creatures, and worlds for games or animation almost always build the wrong portfolio first — a folder of finished, polished, fully rendered images, when the work that actually earns a place is the messier evidence of how those images were arrived at. Concept art is a design discipline before it is an illustration discipline, and both admissions reviewers and studio recruiters are looking for problem-solving, not decoration. Here’s what belongs in a teen concept art portfolio, what quietly disqualifies otherwise strong work, and a realistic order for building it over a year.

    Concept Art Is Design Work, Not Finished Illustration

    The distinction matters more than almost anything else in this article.

    An illustration answers a brief with a single resolved image. Concept art answers a brief with options — a range of solutions to a design problem, explored quickly, evaluated, and narrowed. A concept artist working on a creature isn’t asked for a beautiful creature. They’re asked for twelve silhouettes by Thursday, of which two will be developed, of which one will be built.

    Teen portfolios routinely miss this because the work that gets attention online is the finished hero image. So students spend eleven weeks rendering one dragon and arrive with a portfolio that demonstrates patience and rendering ability but says nothing about how they think.

    What reviewers want to see instead:

    • Iteration. Multiple distinct solutions to the same problem, shown together.
    • Silhouette thinking. Shape language explored before detail is added.
    • Constraint. Designs that respond to a stated brief — a function, an environment, a material, a culture — rather than floating free.
    • Callouts. Orthographic views, detail insets, colourways, scale references. The design communicated well enough that someone else could build it.

    A single page showing eight silhouette explorations, three developed thumbnails, and one resolved design tells a reviewer far more than three unrelated finished paintings.

    The Fundamentals Get Checked First, Every Time

    There’s a persistent belief among teen artists that concept art is a shortcut around traditional drawing — that if the designs are imaginative enough, the foundational work matters less. In our experience preparing portfolios for design-track programs, the opposite is true: imaginative work is exactly where weak fundamentals become most visible, because there’s no reference photograph propping up the anatomy.

    Every portfolio reviewer for a design or animation program will look for the same underlying competencies:

    Observational drawing. Studies from life — figures, hands, drapery, objects, architecture. Not photo copies. This is the single most reliable indicator of whether a student can draw what they haven’t seen before.

    Perspective. Constructed environments with a defensible horizon and vanishing points. Freehand-only environment work reads immediately as guessed.

    Anatomy and structure. For creature and character work, evidence that the student understands skeletons and mass, not just surface.

    Value and light. Greyscale studies that show a student can build form without relying on colour to do the work.

    Colour reasoning. Limited palettes chosen deliberately, with an explanation available if asked.

    A portfolio of striking designs with no observational work behind them tends to be read as a student who has learned a style rather than a skill. Conversely, strong fundamentals plus modest design work is a very common profile among accepted students, because fundamentals are the harder thing to teach later.

    The Sketchbook Is Not Optional

    Most Canadian art and design programs ask to see a sketchbook alongside the finished pieces, and for concept art applicants it is often the most persuasive single item in the submission.

    A working sketchbook shows volume, habit, and unedited thinking. It should contain life drawing, bad ideas, abandoned starts, notes, thumbnails, measurements, and marginalia. Students frequently sabotage this by producing a “portfolio sketchbook” — a clean, curated object made in three weeks. Reviewers recognise these instantly, and they undercut the credibility of everything around them.

    The useful instruction is simply to draw in it constantly, from life, for a year, and then submit the real thing.

    The Fan Art Problem

    This is the most common avoidable mistake in teen concept art portfolios, and it costs students real ground.

    Work built on existing intellectual property — established game characters, film creatures, anime properties — demonstrates rendering skill but not design thinking, because the design decisions were made by someone else. Reviewers can’t assess a student’s shape language from a faithful rendering of a character whose shape language was determined by a studio a decade ago.

    There’s also a practical dimension: portfolios that will later be shown to studios shouldn’t be built on other companies’ properties.

    The fix isn’t to abandon the influence. It’s to convert it into original work with a stated brief. Instead of drawing an existing game’s armoured knight, write a brief — a coastal salvage culture that builds armour from ship plating — and design three variants. The same visual appetite, now demonstrating design capability. Students almost always find this produces stronger work than the fan piece did.

    Building the Mix

    Piece counts vary by school and are revised annually, so check each program’s current published requirements before finalising anything rather than relying on figures from an older guide. OCAD University, as an example, asks for a relatively small number of finished works — in the range of eight to ten — alongside a sketchbook and a written statement of intent, which means every included piece carries substantial weight.

    For a concept-art-focused applicant, a defensible mix across roughly that many pieces looks like:

    • Two to three observational studies — figure, hands, or still life from life, unmistakably not from photographs
    • One to two constructed environments — perspective-built, with a clear light source
    • Two design sequences — each showing exploration through to a resolved design, ideally on a single sheet
    • One character or creature turnaround — front, side, back, with a scale reference
    • One fully resolved rendered piece — the portfolio’s strongest image, demonstrating finish quality
    • One personal or observational piece unrelated to genre work — often the piece that most distinguishes an applicant

    Programs beyond OCAD — Sheridan, Seneca, Emily Carr and others — each set their own requirements and weightings, and several place different emphasis on observational work versus design work. The mix above adapts to most of them, but the specific counts should always come from the school’s current admissions page.

    Students working through this with an instructor generally build a stronger mix than those working alone, largely because the sequencing is hard to self-manage. Our portfolio preparation program is structured around exactly this problem — building fundamentals and design work in parallel rather than in sequence, so a student isn’t spending the final term discovering they need life drawing. Local families can find the same program detailed for portfolio preparation in Etobicoke, with one-hour private sessions at $310 monthly and a $70 trial that includes an honest assessment of where the current work stands.

    A Twelve-Month Build Order

    For a student beginning the summer before their final year of high school:

    Months 1–3 — fundamentals only. Life drawing weekly. Perspective construction. Greyscale value studies. No finished pieces. This stretch feels unproductive and is the reason most self-directed portfolios fail.

    Months 4–6 — design under constraint. Written briefs, silhouette exploration, thumbnails. Volume over polish. Two design sequences begun.

    Months 7–9 — resolution. The strongest two or three explorations get developed to finish. Turnarounds built. Environments rendered.

    Months 10–11 — selection and presentation. Cut ruthlessly. Photograph or scan everything properly. Sequence the portfolio so the strongest piece opens it. Write the statement of intent.

    Month 12 — buffer. Something will go wrong. This month is why it won’t matter.

    FAQ

    Is digital work acceptable, or do schools want traditional media?

    Both are accepted at Canadian programs, and a mixed portfolio is common. What reviewers care about is whether the observational work is genuinely observational — digital studies from life are fine; digital work traced or heavily referenced from photographs is not, and it is more visible than students expect.

    How much does the statement of intent actually matter?

    More than most applicants assume. It’s where a reviewer learns why the pieces were made and how the student thinks about their own work. A specific, plainly written statement about a design problem the student found interesting outperforms a general declaration of passion for art.

    Should a teen build a portfolio around one franchise or genre they love?

    Around a genre, sometimes — around a franchise, no. Genre coherence can read as focus. Existing intellectual property removes the design decisions from the student’s hands and limits what a reviewer can assess.

    Can a student with weak drawing skills still build a concept art portfolio in a year?

    Yes, if the year is spent correctly. Twelve months of consistent observational practice moves most motivated students a long way. What doesn’t work is spending that year on finished pieces while hoping the fundamentals improve incidentally.

    Do concept art programs expect animation or 3D work as well?

    It varies considerably by program, and some design-track programs value evidence of three-dimensional thinking — maquettes, orthographic drawings, model sheets. Check each school’s stated expectations. Broadly, strong two-dimensional design thinking is the prerequisite, not the optional extra.

    Are group art classes suitable for portfolio building?

    Our group art classes are for children, and portfolio work is taught privately, one to one. That structure is deliberate: portfolio building is a sequence of individual decisions about an individual student’s gaps, which doesn’t translate to a shared curriculum.

    Starting the Build

    The teenagers who end up with strong concept art portfolios are rarely the ones who were most naturally gifted at fifteen. They’re the ones who spent the first third of the process on drawing that didn’t look like concept art at all, and who learned to show their thinking rather than only their results.

    If your teen is beginning this and you’d like an honest read on where their current work sits against what programs actually ask for, book a trial session at our Etobicoke studio near Cloverdale Mall. For a broader look at how finished submissions come together, our breakdown of OCAD portfolio examples from accepted students is a useful companion — and if you’d rather ask questions first, request more information and we’ll respond with specifics.

  • Failing an RCM Exam: What Happens Next and How Students Recover

    Failing an RCM Exam: What Happens Next and How Students Recover

    Failing an RCM Exam: What Happens Next and How Students Recover

    An unsuccessful Royal Conservatory exam result lands harder than almost anything else in a young musician’s life, partly because it arrives in writing weeks after the fact, when the student has already moved on. The practical reality is far less severe than it feels in the first hour — a failed exam is a snapshot of one twelve-minute window, it carries no permanent record, and the recovery path is well worn. Here’s what actually happens next, how to read the examiner’s report usefully, and how to structure the months before a retake so the second attempt goes differently.

    What an Unsuccessful Result Actually Means

    The Royal Conservatory marks practical examinations out of 100, with a defined pass threshold and marking bands above it that separate a pass from honours-level results. A result below that threshold means the exam was not passed at that level on that day. It does not mean anything about the student’s musicianship in general, and it does not follow them anywhere.

    Some specifics worth being clear about, because families often assume worse:

    • There is no permanent transcript of an unsuccessful attempt. A retake that passes is simply a pass at that level.
    • Nothing is forfeited at lower levels. Previously earned certificates stand.
    • The student does not have to move down a level. Retaking the same level is the normal path.
    • The examiner is not the same person you’ll see next time, in most cases — and examiners assess against published standards, not against a memory of a previous candidate.

    Marking bands, session structure, registration windows, and fees are set by the Royal Conservatory and are revised periodically, so confirm the current details on the official RCM site rather than relying on what was true a year or two ago. What follows is about the teaching and preparation side, which is where the outcome of a retake is actually decided.

    Read the Examiner’s Report Before Reacting to the Mark

    The single most common mistake families make is reading the number, feeling the disappointment, and never properly reading the comments.

    The report is the most valuable teaching document a student receives all year. It’s written by a trained examiner who heard the whole exam and had no stake in the outcome, and it almost always identifies the problem precisely. Read it with the teacher present if possible, and sort the comments into three piles:

    Technical comments — intonation, tone, hand position, stick control, uneven scales, pedalling. These are usually the most fixable, and they usually indicate that the level was attempted before the underlying technique was ready.

    Musical comments — phrasing, dynamic range, tempo stability, stylistic understanding. These take longer to address but respond well to focused work on a smaller number of pieces.

    Exam-condition comments — memory slips, restarts, rushed tempi, sight-reading or ear tests below standard. These often indicate that the student knew the material but couldn’t access it under pressure, which is a different problem with a different fix.

    That third category is worth pausing on, because it’s where most surprises live.

    The Most Common Reason a Well-Prepared Student Doesn’t Pass

    Parents frequently say some version of: she played it perfectly at home for weeks. That’s usually accurate, and it’s also the clue.

    At Muzart, the most common pattern we see behind a disappointing exam result is that the student’s preparation had quietly turned into passive repeat-throughs. The piece was played from the top, start to finish, over and over, until it flowed. It sounded finished. But the student had only ever accessed the piece as one continuous chain — and a chain has a single point of failure.

    Under exam conditions, one small stumble in bar 19 breaks the chain, and there’s nothing underneath to catch it. The student either restarts from the beginning, loses the thread entirely, or plays on with the tempo and the nerves both compromised. The examiner isn’t hearing a student who doesn’t know the piece; they’re hearing a student who knows it in only one direction.

    The correction is specific and it works:

    • Practise from anywhere. The student should be able to begin cleanly at any structural landmark in the piece — a section start, a repeat, a key change — cold, without playing into it.
    • Practise the recovery, not just the piece. Deliberately stop at a difficult bar and rehearse continuing from the following phrase. Recovery is a skill, and it can be trained.
    • Practise below tempo more than at tempo. Anything that only exists at performance speed will not survive adrenaline.
    • Perform it badly on purpose, for people. Play the piece for a family member on a Tuesday evening with no warm-up. The gap between home playing and exam playing shrinks with exposure.

    This is also where preparation frequency matters. Sessions that happen twice a week produce playing that is fluent only when conditions are ideal. Sessions that happen five times a week, even short ones, produce playing that holds up when they aren’t.

    Retake the Same Level, or Step Back?

    This decision belongs to the teacher, but parents should understand the reasoning.

    Retake the same level when the report shows the material was broadly at standard and specific elements fell short — a weak sight-reading component, one under-prepared piece, a technical requirement below tempo. This is the majority of cases.

    Step back a level when the report shows the same weakness across every component: technique consistently below standard, tone underdeveloped, tempo unstable throughout. That pattern usually means the level was attempted a year early, and repeating it without addressing the foundation tends to produce a similar result.

    Delay rather than reschedule immediately when the student’s relationship with the instrument has taken a real hit. A student who is dreading the piano is not going to prepare well for a retake eight weeks later, whatever the report says.

    Working through this with a teacher who knows the syllabus well matters more than usual here. Structured RCM examination preparation in Etobicoke is built around exactly this kind of diagnosis — matching a candidate to the level they can genuinely hold, rather than the level their age suggests.

    A Realistic Retake Timeline

    For a student retaking the same level, a workable shape looks roughly like this:

    Weeks 1–2 — deliberate distance. No exam repertoire. Play something the student likes that isn’t on any syllabus. This is not lost time; it repairs the relationship with the instrument, without which nothing else works.

    Weeks 3–6 — rebuild the foundation. Technical requirements only, slowly, plus whichever weakness the examiner named. Scales and études below tempo, with attention to evenness rather than speed. Sight-reading three times a week for five minutes.

    Weeks 7–14 — repertoire, rebuilt differently. Return to the pieces, but learned in sections and practised from arbitrary starting points from day one. Aim for performance-ready roughly a month before the exam, not the week before.

    Final month — exam conditions. Full run-throughs, cold, in the morning if the exam is in the morning, in front of people. Ear and sight-reading components under time pressure. The goal in this stretch is not improvement; it’s stability.

    Piano candidates in particular benefit from having a teacher who structures this explicitly week by week — our piano lessons in Etobicoke run on written practice assignments rather than page numbers, which is what keeps a retake preparation from sliding back into repeat-throughs. Voice candidates working through the same cycle can find the equivalent structure in our singing lessons in Etobicoke, where exam-condition rehearsal matters just as much.

    Protecting the Student Through It

    The musical recovery is usually straightforward. The emotional one determines whether the student is still playing in two years.

    A few things that help, and one that doesn’t:

    • Name it accurately in front of the student. “The sight-reading wasn’t ready” is useful. “You failed” is a description of a person rather than a performance.
    • Let the disappointment exist for a few days. Rushing to reassure often reads as dismissal.
    • Separate the exam from the instrument. Exams are one framework for measuring progress, not the reason to play.
    • Don’t immediately book the next session. A retake registered the same week as the result usually gets prepared under a cloud.

    Most students who pass a level on the second attempt describe the retake as easier than the first — not because the standard dropped, but because they knew what the room felt like.

    FAQ

    Does a failed RCM exam appear on the student’s record?

    No. Certificates are issued for successful examinations; an unsuccessful attempt does not create a lasting record and does not affect previously earned certificates or standing at lower levels.

    Can a student retake only the component they failed?

    Practical examinations are assessed as a whole and are retaken as a whole — the student performs the full exam again rather than just the weak component. Because requirements and policies are set by the Royal Conservatory and are updated from time to time, confirm the current rules on the official RCM site before planning a retake.

    How soon should a student attempt the level again?

    Most students are best served by the next available session that allows roughly three to four months of preparation, rather than the soonest one. Rushing back with six weeks of work tends to reproduce the original result.

    Is it a bad sign if a student needs to step back a level?

    It’s a common and often very productive move. A student who spends a term consolidating a level they can genuinely hold typically moves through the next two levels faster than one who scrapes through each. Stepping back once rarely slows anyone down over a few years.

    Should the student change teachers after an unsuccessful exam?

    Not usually as a first response. What matters is whether the teacher can explain specifically why the result happened and what will be different in the retake preparation. A clear, specific answer to that question is a good sign. A vague one — or a plan that amounts to “practise more” — is worth a second opinion.

    Do exam results matter for arts high school or university applications?

    Certificates at higher levels can support an application, but no admissions process is derailed by one unsuccessful attempt at an intermediate level. Consistency and current playing standard carry far more weight than a clean examination history.

    Getting a Retake Preparation Started Properly

    A disappointing result is uncomfortable and temporary. What determines the second attempt is not how hard the student works in the final month — it’s whether the preparation is structured differently from the first time, with material learned in sections and rehearsed under something resembling exam pressure.

    If you’d like a teacher’s assessment of an examiner’s report and a realistic plan for the retake, book a trial lesson at our Etobicoke studio near Cloverdale Mall — trial lessons run $35, and ongoing monthly instruction is $155 with materials included. If you’d prefer to talk it through before booking anything, request more information and we’ll give you a straight read on whether a retake at the same level makes sense.

  • August Music Lessons in Etobicoke: What Early Starters Gain

    August Music Lessons in Etobicoke: What Early Starters Gain

    August Music Lessons in Etobicoke: What Early Starters Gain

    Most Etobicoke families decide on music lessons in early September, alongside every other fall commitment, and then wonder why the first two months feel like a scramble. Starting in August changes the arithmetic entirely — a beginner who takes four lessons before school resumes arrives at the September rush already past the awkward part, with a practice routine that was built in a quiet month rather than a crowded one. Here’s exactly what those four weeks buy, and the one situation where waiting until September is genuinely the better call.

    The Real Advantage Is a Quiet Calendar, Not a Head Start on Repertoire

    The obvious pitch for an August start is that you get four extra lessons. That’s true, and it matters, but it’s not the part that changes outcomes.

    The part that changes outcomes is that August is empty. There’s no homework, no report card, no team practice on Wednesdays, no 8:00 p.m. bedtime crunch. A new student can sit down at the instrument at 4:30 in the afternoon with nothing else pressing, five days a week, and the routine forms without competing against anything.

    That matters because the hardest part of beginning an instrument is not the instrument. It’s building a daily habit in a household that doesn’t currently have one. Habits established in a low-pressure month survive the return of school. Habits attempted for the first time in late September — during the same three weeks the family is also absorbing new teachers, new schedules, and new extracurriculars — very often don’t.

    By October, the August starter and the September starter are usually at similar musical levels. They are not at similar levels of routine, and that gap tends to persist for the whole year.

    The First Four Weeks Are the Least Rewarding — Get Them Out of the Way

    There’s an honest thing worth saying about beginning any instrument: the opening month is the least fun month.

    A beginner pianist spends the first few weeks on hand position, finding middle C, and playing five-note patterns that don’t sound like music yet. A beginner guitarist spends it building fingertip calluses and fighting a barre-free chord change that refuses to happen cleanly. A beginner drummer spends it on grip and single-stroke rolls on a pad. None of this is discouraging in itself — but it’s the stretch where a student needs the most patience and the fewest competing demands.

    Doing that stretch in August means the student hits September already able to play something. That’s a meaningfully different emotional starting point when the school year’s demands arrive. They’re no longer a person who is trying to learn piano; they’re a person who plays a bit of piano and is getting better.

    For families choosing an instrument, this is also the month with the most room to test the decision. A trial lesson at $35 is a low-stakes way to find out whether a seven-year-old’s interest in drums is real or borrowed from a cousin — and August leaves time to change course before the fall schedule sets.

    Teacher Availability Is at Its Widest in August

    This is the practical, unglamorous reason, and it’s the one most families discover too late.

    Private instruction runs on individual time slots. A single teacher has a finite number of after-school hours, and the desirable ones — roughly 4:00 to 7:00 p.m. on weekdays — are the same slots every family wants. Through August, most of those slots are still open. By the last week of September, the 4:30 and 5:30 weekday slots for popular instruments are typically the first to fill, and families arriving then are choosing between a less convenient time and a later start date.

    Starting in August means choosing your slot rather than accepting one. For households with more than one child in lessons, or a parent coordinating around a commute, that difference is worth more than the four extra lessons.

    It also means you’re choosing among instructors rather than being assigned whoever still has room. Whether you’re looking at piano lessons in Etobicoke or singing lessons in Etobicoke, the pairing between student and teacher matters more in the first year than almost anything else, and August is when there’s the most flexibility to get it right.

    Fall Exam and Assessment Timelines Start Counting Now

    For students who are past the beginner stage, August has a different value: it’s the month where the fall term stops being abstract.

    Royal Conservatory candidates preparing for a winter session need a realistic count of the weeks between now and the exam, and that count is far more comfortable when it starts in early August than in early October. Repertoire needs to be chosen, technical requirements need to be under the fingers well before the piece is performance-ready, and theory co-requisites need their own runway. Students who begin structured RCM examination preparation in Etobicoke in August generally aren’t rushing anything by November — and the ones who begin in October generally are.

    Registration windows, session dates, and fees are set by the Royal Conservatory and change from year to year, so check the official RCM site for the current cycle rather than relying on last year’s calendar. But the planning principle holds regardless of the specific dates: the useful preparation time is the time before the panic starts.

    What an August Start Actually Looks Like

    For a typical beginner starting in the first week of August, the month runs roughly like this:

    Lesson one — instrument setup, posture and hand position, and the first playable exercise. The student goes home with something they can do, deliberately kept small.

    Week one at home — ten minutes a day, five days. This is the habit-building week; musical content is almost secondary.

    Lessons two and three — the first real piece begins, and the practice assignment becomes specific: named bars, named tasks, not “play through it.”

    Week three — the routine stops requiring reminders in most households. This is the milestone that actually determines the year.

    Lesson four — by the end of August, a beginner can typically play a short piece from start to finish, hands together for pianists, cleanly enough to perform it for a grandparent.

    That’s the state most students would otherwise be reaching in early October. Reaching it in late August, before school begins, means September adds a schedule rather than adding a challenge.

    Ongoing monthly tuition runs $155 with all materials included, so an August start is a one-month commitment before the school year even begins — a genuinely low-risk way to test whether music fits your family’s fall.

    When Waiting Until September Is the Better Choice

    August isn’t right for everyone, and it’s worth being straight about the exception.

    If your family is away for a substantial portion of the month, don’t start. Four lessons with a two-week gap in the middle is worse than a clean September start — the interrupted routine teaches a beginner that practice is optional, which is precisely the wrong first lesson. A student who can only attend two of four August lessons is better served beginning fresh after Labour Day.

    The same applies if the student is genuinely on the fence. A reluctant beginner pushed into August lessons to “get ahead” tends to arrive in September already tired of the instrument. Interest first, timing second.

    FAQ

    Is it worth starting music lessons with only a few weeks left in summer?

    Yes, provided the family is actually in town for them. Four consecutive lessons is enough to get a beginner past the least rewarding stage and to establish a home practice routine. Two scattered lessons across a travel-heavy month is not — in that case, September is the better start.

    Do lessons continue straight through from August into the school year?

    They do. Instruction runs continuously, so an August start simply becomes the beginning of the student’s ongoing schedule rather than a separate summer program. The time slot chosen in August is the slot the student keeps into the fall, which is a large part of the advantage.

    My child wants to try an instrument but might not stick with it. Should we wait?

    August is the better month to find out, not the worse one. A trial lesson costs less and carries less scheduling weight in August than a mid-September commitment does, and if the instrument turns out to be the wrong fit, there’s still time to try a different one before the fall routine locks in.

    Is August a good time for an adult beginner to start?

    Often the best time. Adult learners face the same routine-building problem as children and usually have more schedule pressure, not less. Beginning in a month with lighter obligations — and, for many, some vacation time — gives an adult beginner the same runway advantage. Adults study privately, at whatever pace their schedule allows.

    Can we start in August and switch instruments later?

    Yes, and it’s not unusual. A student who spends August on piano and decides in October that guitar is the better fit hasn’t lost anything — foundational reading, rhythm, and practice habits transfer. What doesn’t transfer is a routine that was never built in the first place.

    Booking an August Start

    The families who feel calmest in late September are almost always the ones who made the decision in early August. There’s no rush pricing, no promotional urgency, and no advantage that disappears at midnight — just a quieter month, a wider choice of time slots, and four weeks of habit-building that happen before school competes for them.

    If you’d like to start this month, book a trial lesson at our Etobicoke studio near Cloverdale Mall and we’ll match your child — or you — with the right instructor and a slot that works for the fall. If you’re still weighing instruments or timing, request more information and we’ll talk through what makes sense for your family’s schedule.

  • Piano Plateau in Etobicoke: The Two Causes Teachers See Most

    Piano Plateau in Etobicoke: The Two Causes Teachers See Most

    Piano Plateau in Etobicoke: The Two Causes Teachers See Most

    Most parents notice a piano plateau long before they can name it — lessons keep happening, the books keep coming home, but nothing new seems to actually be getting learned. In our experience teaching piano in Etobicoke, a genuine stall almost never comes from a lack of ability or a bad fit with the instrument; it comes from two specific and highly fixable changes in how practice is happening at home, usually at the same time. Here’s what those two causes look like from the bench, why they compound each other, and the four-week reset that most often breaks the pattern.

    What a Real Plateau Looks Like — and What It Doesn’t

    Piano progress is naturally uneven, and a slow month is not a plateau. A student who spends four weeks wrestling with their first piece in three sharps, or their first real hand-independence challenge, is not stuck — they are doing exactly what learning looks like when the difficulty steps up. That kind of slow patch resolves on its own, usually the week the piece finally clicks.

    A real plateau looks different. The markers we watch for:

    • Repertoire stops turning over. Eight to twelve weeks with the same two or three pieces, and none of them finished to performance standard.
    • Sight-reading stalls or slips backward. New material takes noticeably longer to decode than it did in the spring.
    • The same mistakes survive the same corrections. A bar the teacher fixed in April is still wrong in July.
    • Lesson energy changes. The student isn’t resistant, exactly — they’re passive. They wait to be told what to do rather than arriving with something to show.

    That last one is the most reliable signal, and it’s also the one parents tend to read as a motivation problem. It usually isn’t. Motivation collapses after progress stops, not before. Something mechanical went wrong first.

    Cause One: Practice Became Passive Repeat-Throughs

    This is the more common of the two, and the harder one for parents to spot — because from the next room, it sounds exactly like practising.

    The student sits down, opens to the piece, and plays it from the top. They hit the same rough patch in bar 11, stumble, keep going, and finish. Then they do it again. Then maybe a third time. Twenty minutes at the bench, three complete run-throughs, and the child genuinely feels they practised.

    What actually happened is twenty minutes of performing and zero minutes of practising. Worse, the rough patch in bar 11 got rehearsed three more times in its broken form. The error isn’t fading — it’s being reinforced with every pass.

    At Muzart, the most common pattern we see behind a stalled piano student is exactly this: practice that has quietly turned into passive repetition, paired with a practice week that has shrunk without anyone noticing. The two together are far more damaging than either alone.

    How to tell if this is happening in your house:

    • Ask your child to play bars 9 through 16 only, starting cold. If they can’t begin anywhere except the very top of the piece, they’ve been repeating rather than practising.
    • Listen for whether the hard section is played more than the easy sections. In real practice, it should be played five or six times as often. In repeat-throughs, everything gets played exactly once per pass.
    • Watch for tempo. Repeat-throughs happen at performance speed. Actual practice happens slower than performance speed, often much slower.

    The fix is not more time. It’s a different unit of work: instead of “play the piece,” the instruction becomes “play bars 9 to 12, hands separately, four times slowly, then twice hands together.” That’s a task with a finish line. A run-through has no finish line, which is precisely why it expands to fill the session and accomplishes nothing.

    Cause Two: Practice Days Quietly Dropped to One or Two

    Nobody decides this. That’s what makes it hard to catch.

    A family starts the year with practice on most days. Then swimming moves to Tuesdays. Then there’s a school project week. Then a stretch of summer where the routine dissolves entirely. By August, practice is happening the night before the lesson and maybe once on the weekend — and because those two sessions are long and dutiful, the household experience is still “she practises.”

    Two sessions per week is not a smaller version of five sessions per week. It’s a categorically different thing. Physical skills consolidate between sessions, not during them, and the gaps between practice days are where the previous day’s work either gets locked in or fades. Stretch the gap to three or four days and a meaningful portion of each session gets spent recovering ground that was already covered — which means the student arrives at the lesson roughly where they were the week before, week after week.

    This is the mathematics of a plateau. Not laziness, not talent, not the wrong teacher. Five twelve-minute sessions will move a student further in a week than two forty-minute sessions, every time, and it isn’t close.

    Why the Two Causes Compound

    Separately, either problem slows a student down. Together, they create a genuine standstill — and they feed each other.

    Long, infrequent sessions almost force passive repetition. When a child sits down knowing they have forty minutes to fill and haven’t touched the piano in four days, run-throughs are the path of least resistance; detailed section work requires a fresh memory of what the teacher actually asked for. Meanwhile, passive repetition makes practice feel unrewarding, because nothing improves — which makes it easier to skip the next day. Skipping makes the next session longer and vaguer. The loop closes.

    Break either half and the loop weakens. Break both and progress usually resumes within a month.

    The Four-Week Reset

    This is the sequence we use most often with families who come to us mid-plateau. It works because it changes frequency and structure in a deliberate order rather than all at once.

    Week one — shrink the session, name the target. Cut practice to twelve minutes, five days. The goal is not progress this week; the goal is re-establishing that practice happens on ordinary days. Every session gets one named target written at the top of the page: bars 9–12, left hand. Not “practise piano.”

    Week two — slow down and isolate. Same twelve minutes, same five days, but now the rule is that the hardest four bars get played more times than the whole piece does. Hands separately first. Metronome well below performance tempo. If the student can play it fast but not slow, they don’t know it yet.

    Week three — rebuild duration. Move to twenty minutes, still five days. Add a “start anywhere” drill: the parent picks a bar number at random and the student begins there. This is the single fastest way to convert a repeat-through habit into real command of a piece.

    Week four — add a deadline. A plateau often persists because there’s nothing on the calendar. A recital slot, a family performance, or a registered exam date changes the character of practice immediately. For students working through the Royal Conservatory syllabus, booking the next level well in advance is often the intervention that does the most work — structured RCM examination preparation in Etobicoke gives the practice week a shape that self-directed repertoire rarely does.

    Where the Teacher Fits — and What to Ask

    Plateaus are a normal part of a teaching relationship, not evidence that it’s failing. What matters is whether the teacher has named the plateau and changed something in response. If nothing about the lesson plan has changed in two months, that’s worth raising.

    Useful questions to bring to your next lesson:

    • “What specifically should she be doing in a practice session this week — not which piece, but which task?”
    • “Is the current repertoire level right, or did we move up before the technique was ready?”
    • “What would you want to see at home for the next three weeks?”

    Good teachers welcome these. The answers also give parents something concrete to supervise, which matters more than most families expect — a parent who can ask “did you do the bar 9 to 12 task?” is far more useful than a parent asking “did you practise?”

    Our own piano lessons in Etobicoke are built around this: weekly private instruction with a specific, written practice assignment rather than a page number, because the assignment is what determines whether the week produces progress. Families near Cloverdale Mall can start with a trial lesson at $35, and ongoing monthly tuition runs $155 with all materials included.

    FAQ

    How long does a slow patch have to last before it counts as a plateau?

    Roughly eight weeks with no repertoire turnover and no improvement in sight-reading. Below that, it’s usually just a hard piece. Above that, something structural has changed — most often practice frequency, practice quality, or both.

    My child says they’re bored. Is that the real problem?

    Boredom is almost always a symptom rather than a cause. Students get bored when nothing is improving, because improvement is what makes practice feel worth doing. Fix the practice structure and the boredom usually resolves without anyone addressing it directly. If it persists after four weeks of genuine section work, then it’s worth looking at repertoire choice.

    Is switching teachers the answer to a plateau?

    Rarely, and it’s usually the wrong first move. Switching resets the relationship, the repertoire, and the diagnostic history, which costs a student several months. Try changing the practice structure first, and raise the plateau explicitly with the current teacher. If nothing changes after a month of clear conversation, that’s a different situation.

    How much daily practice actually breaks a plateau?

    Less than most parents assume. Twelve to fifteen focused minutes, five days a week, outperforms forty minutes twice a week by a wide margin for students under about twelve. The frequency is doing the work, not the total.

    Would a better instrument help?

    Sometimes — an unweighted keyboard genuinely does hold back technique past the early grades, and a piano that won’t hold tune makes careful listening impossible. But instrument upgrades don’t fix a two-day practice week, and families who upgrade during a plateau often find the plateau simply continues on nicer equipment. Address the routine first.

    Can group lessons help a plateaued student?

    We teach music privately only, and for a stalled student that’s the right structure regardless — the entire problem is that the practice assignment isn’t specific enough to that individual, and individual attention is what corrects it.

    Getting a Stalled Student Moving Again

    A plateau is diagnostic information, not a verdict. In nearly every case we see, it points at two ordinary things that drifted — the practice week got shorter, and the practice itself got passive — and both respond quickly once they’re named.

    If your child has been stuck for a season and you’d like a teacher’s read on which of the two is doing the damage, book a trial lesson and we’ll assess it directly at the piano. If you’d rather talk it through first, you can request more informationand we’ll get back to you with a straight answer about whether a change of approach is likely to help.